Welcome to the Honeywell TH6210U2001 Installation Manual! This guide provides step-by-step instructions for installing, configuring, and maintaining your thermostat. Ensure safety, compatibility, and proper setup for optimal performance.
1.1 Overview of the Honeywell TH6210U2001 Thermostat
The Honeywell TH6210U2001 is a programmable thermostat designed for precise temperature control and energy efficiency. It features a user-friendly interface, advanced scheduling options, and compatibility with various HVAC systems. This model includes the UWP mounting system and a J-box adapter for easy installation. The thermostat supports standard and optional cover plates, ensuring a sleek appearance. Its functionality and adaptability make it a versatile choice for modern home heating and cooling needs.
1.2 Importance of Proper Installation
Proper installation of the Honeywell TH6210U2001 thermostat is crucial for ensuring optimal performance, safety, and energy efficiency. Incorrect installation can lead to system damage, safety hazards, or inefficient heating and cooling. Following the manual’s guidelines guarantees compatibility with your HVAC system and prevents potential issues. Proper setup also ensures accurate temperature control, reducing energy consumption and enhancing comfort. Always prioritize correct installation procedures to maximize the thermostat’s functionality and longevity.
Pre-Installation Requirements
Before installation, ensure compatibility with your HVAC system, verify all components are included, and follow safety guidelines to avoid risks and ensure a smooth setup process.
2.1 Checking Compatibility with HVAC Systems
Before installation, verify that the Honeywell TH6210U2001 is compatible with your HVAC system. It works with most heating, cooling, and heat pump systems but is not compatible with millivolt systems. Ensure your system operates on 24V AC power. Refer to the user guide or Honeywell’s compatibility checker tool for confirmation. Proper compatibility ensures safe and efficient operation. If unsure, consult a professional to avoid installation issues.
2.2 Understanding the Package Contents
Your Honeywell TH6210U2001 package includes the thermostat, UWP mounting system, J-box adapter, decorative cover plate, and installation instructions. Familiarize yourself with each component to ensure nothing is missing. The UWP mounting system simplifies installation, while the J-box adapter ensures compatibility with standard electrical boxes. The decorative cover plate enhances the thermostat’s appearance. Refer to the provided manual for detailed descriptions and usage guidelines to proceed confidently with the installation process.
2.3 Safety Precautions Before Starting
Before installing the Honeywell TH6210U2001, ensure the power to your HVAC system is turned off at the circuit breaker. Wear protective gloves and safety glasses to prevent injury. Verify the system is cool to avoid burns. Ensure the work area is clean, flat, and stable. Follow all safety guidelines in the manual to avoid electrical shocks or damage to the thermostat. Proper preparation ensures a safe and successful installation process.
Step-by-Step Installation Process
Mount the thermostat, connect the wiring, install the adapter, and secure it to the wall. Turn off power before starting and follow the manual carefully for safety.
3.1 Mounting the Thermostat
Begin by removing the old thermostat and ensuring the wall is clean and dry. Use the provided UWP mounting system or J-box adapter for secure installation. Align the thermostat base with the wall anchors, ensuring it is level. Gently press the thermostat onto the base until it clicks. Make sure all connections are secure and the device is properly seated for reliable operation. Turn the power back on after mounting is complete.
3.2 Connecting the Wiring
Before connecting the wiring, ensure the power to your HVAC system is turned off. Use the UWP mounting system or J-box adapter if necessary. Match the wires from your HVAC system to the corresponding terminals on the thermostat, following the user manual. Securely attach each wire to the correct terminal, ensuring no loose connections. Double-check the wiring configuration to avoid errors. Refer to the manual for specific wiring guidelines tailored to your system type.
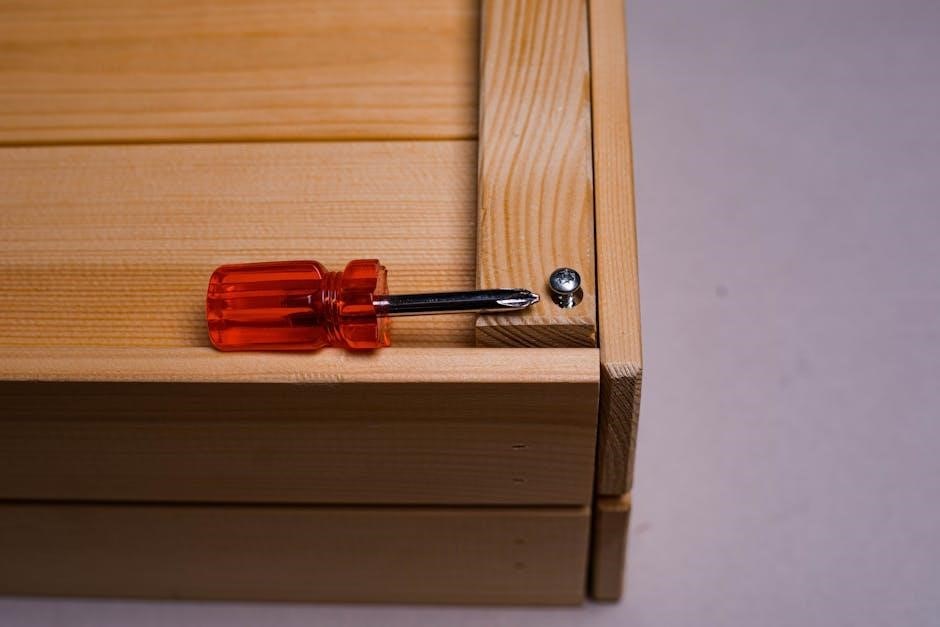
3.3 Installing the Adapter (J-box Adapter)
The J-box adapter is essential for mounting the thermostat on a junction box. Attach the adapter to the junction box using the provided screws, ensuring it is securely fastened. Once installed, align the thermostat with the adapter and gently press it into place until it clicks. This ensures a stable and level installation, maintaining proper functionality and appearance. Follow the manual for precise alignment and securement.
3.4 Securing the Thermostat to the Wall
After attaching the J-box adapter, ensure the thermostat is properly secured. Align the device with the adapter, gently pressing until it clicks into place. Verify the thermostat is level and firmly attached to the wall. Use the provided screws to tighten any loose connections. A secure installation prevents movement and ensures accurate temperature readings and reliable operation. Double-check all connections for stability before proceeding.

Advanced Installation Settings
Configure installer settings, mount the UWP system, and optionally install a decorative cover plate for a polished look and enhanced functionality of your Honeywell thermostat.
4.1 Configuring the Installer Setup (ISU)
Access the Installer Setup (ISU) by pressing and holding the CENTER button for 3 seconds. Navigate through advanced settings to customize system parameters, ensuring compatibility with your HVAC system. Adjust temperature ranges, fan settings, and other configurations as needed. Refer to the manual for detailed instructions to optimize performance and ensure proper thermostat operation.
4.2 Setting Up the Mounting System (UWP)
The UWP Mounting System ensures secure installation. Attach the UWP adapter to the junction box, aligning it with the wall. Gently press the thermostat onto the adapter until it clicks. Ensure the display is level and the device is firmly secured. This setup guarantees stability and proper functionality, following Honeywell’s guidelines for a seamless installation process.
4.3 Optional Cover Plate Installation
The decorative cover plate enhances the thermostat’s appearance without affecting functionality. Peel the protective film and align the plate with the thermostat’s edges. Gently press until it snaps into place. Ensure proper alignment for a seamless look. Refer to the packaging for included cover plates and follow the provided instructions for precise installation. This step adds a finishing touch to your Honeywell TH6210U2001 setup.

Post-Installation Checks
After installation, perform essential checks to ensure the thermostat operates correctly. Test functionality, verify wire connections, and confirm a stable power supply. Refer to the user guide for detailed instructions.
5.1 Testing the Thermostat Functionality
Test the thermostat by adjusting temperature settings and verifying system responses. Ensure heating, cooling, and fan modes activate correctly. Check the display for accurate temperature readings and functionality of buttons. Verify that all programmed schedules work as expected. Refer to the user guide for specific testing procedures to confirm proper operation. This ensures your system runs efficiently and meets your comfort needs.
5.2 VerifyingWire Connections
5.2 Verifying Wire Connections
After installation, turn off power to the HVAC system. Verify all wire connections match the manual’s wiring diagram. Ensure connections are secure and correctly labeled. Check for any loose or misplaced wires. Power the system back on and test thermostat functionality to confirm proper connections. Refer to the user guide for specific wiring requirements and troubleshooting tips if issues arise.
5.3 Ensuring Proper Power Supply
Ensure the power supply to the thermostat is stable and meets the system’s requirements. Verify the voltage matches the specifications in the manual. Use a voltmeter to check the power source before reconnecting. Ensure all connections are secure and properly insulated. Avoid using incorrect voltage, as it may damage the thermostat. Always follow safety guidelines and Honeywell’s recommendations for a reliable and efficient setup. Proper power supply ensures optimal performance and longevity of the device.
Troubleshooting Common Issues
Troubleshooting common issues ensures your Honeywell TH6210U2001 operates smoothly. Address wiring problems, installation errors, and compatibility concerns promptly. Refer to specific sections for detailed solutions.
6.1 Resolving Wiring Issues
Resolving wiring issues is crucial for proper thermostat functionality. Start by turning off the power supply. Check all wire connections for looseness or damage. Ensure wires are securely attached to the correct terminals. If issues persist, consult the installation manual or contact Honeywell support. Verify compatibility with your HVAC system and refer to the troubleshooting section for specific guidance. Always follow safety precautions to avoid further complications.
6.2 Fixing Installation Errors
Fixing installation errors requires careful attention to detail. Start by turning off the power supply and reviewing the installation manual. Common issues include incorrect terminal connections or missed steps. Ensure all wires are securely fastened and aligned with the correct terminals. If the thermostat doesn’t power on, check the circuit breaker or fuse. Resetting the thermostat may resolve software-related issues. Contact Honeywell support if problems persist after verifying connections and settings.
6.3 Addressing Compatibility Problems
Compatibility issues may arise if the thermostat doesn’t align with your HVAC system. Verify system requirements in the manual. Ensure the UWP mounting system is correctly installed. If the thermostat doesn’t function, check for proper adapter installation. Consult the user guide for specific settings. Contact Honeywell support for assistance with system integration. Regular updates and compatibility checks can resolve operational issues. Always refer to the official Honeywell resources for troubleshooting.
Maintenance and Upkeep
Regular maintenance ensures optimal performance. Clean the thermostat, update software, and perform system checks. Refer to the user guide for detailed instructions and troubleshooting tips. Contact Honeywell support for assistance.
7.1 Cleaning the Thermostat
Cleaning the Honeywell TH6210U2001 thermostat is essential for optimal performance. Use a soft, dry cloth to wipe the display and exterior. For tougher stains, lightly dampen the cloth with water, but avoid harsh chemicals. Never spray liquids directly on the device. Clean the thermostat monthly to prevent dust buildup. Ensure the power is off before cleaning to avoid damage. Refer to the user guide for detailed cleaning instructions and maintenance tips.
7.2 Updating Software (if applicable)
Regular software updates ensure your Honeywell TH6210U2001 thermostat performs optimally. Check for updates via the thermostat’s menu or through the Honeywell Home app. Ensure the device is connected to Wi-Fi. Follow on-screen instructions to download and install updates. After installation, reboot the thermostat to apply changes. Always refer to the user guide for specific instructions. Keeping software up-to-date enhances functionality and resolves potential issues. Schedule updates periodically for seamless operation.
7.3 Regular Checks for Optimal Performance
Perform regular checks to ensure your Honeywell TH6210U2001 operates efficiently. Inspect wiring connections for damage or corrosion. Clean the thermostat display and sensors to prevent dust buildup. Verify that the HVAC system responds correctly to temperature adjustments. Check for software updates and install them as needed. Schedule annual professional maintenance for your HVAC system. These steps ensure reliable performance, energy efficiency, and extended product lifespan. Consistent monitoring helps avoid potential issues before they arise.
Frequently Asked Questions (FAQs)
Find answers to common questions about the Honeywell TH6210U2001 thermostat. Topics include troubleshooting, compatibility, and installation tips to help you resolve issues quickly and efficiently.
8.1 What if the Thermostat Doesn’t Turn On?
If the thermostat doesn’t turn on, ensure the power supply is stable and wiring connections are secure. Check circuit breakers or fuses. Verify that the HVAC system is compatible and properly connected. Consult the user manual or contact Honeywell support for assistance. Resetting the device may also resolve the issue. Always follow safety precautions during troubleshooting.
8.2 Can the TH6210U2001 Work with Smart Home Systems?
The Honeywell TH6210U2001 is designed to integrate with various smart home systems, enhancing automation and control. Compatibility varies, but it works seamlessly with Honeywell Home systems and select third-party platforms. Ensure your smart home hub supports the thermostat’s communication protocols. Refer to the user manual for specific compatibility details and setup instructions to enjoy enhanced functionality and convenience.
8.3 How to Reset the Thermostat
To reset your Honeywell TH6210U2001 thermostat, press and hold the “Menu” and “Select” buttons simultaneously for about 5 seconds until the display goes blank. Release the buttons and wait for the thermostat to reboot. This process restores factory settings, resolving minor issues. Note that resetting will erase custom settings, so ensure you have your previous configurations saved before proceeding with the reset.
Additional Resources
For further assistance, visit Honeywell’s official website for detailed guides, contact support, or explore online tutorials and videos for comprehensive help with your TH6210U2001 thermostat.
9.1 Accessing the Full User Guide
The full user guide for the Honeywell TH6210U2001 is available on Honeywell’s official website. It includes detailed installation instructions, troubleshooting tips, and advanced features. Users can download the PDF manual for offline access, ensuring they have comprehensive guidance anytime. Additionally, the guide covers maintenance, software updates, and FAQs, making it an essential resource for optimal thermostat performance and user experience.
9.2 Contacting Honeywell Support
For assistance with the Honeywell TH6210U2001, contact Honeywell Support through their official website or customer service hotline. They offer expert help for installation issues, troubleshooting, and compatibility concerns. Additionally, online resources, FAQs, and video tutorials are available to address common queries and provide step-by-step solutions, ensuring a smooth experience for all users of the Honeywell TH6210U2001 thermostat.
9.3 Online Tutorials and Videos
Honeywell offers a range of online tutorials and videos to guide users through the installation and operation of the TH6210U2001 thermostat. These resources cover topics like step-by-step installation, troubleshooting common issues, and configuring advanced settings. Available on Honeywell’s official website, these visual aids provide clear, actionable instructions to ensure a smooth setup and optimal performance of your thermostat. They are an excellent supplement to the written manual.
The Honeywell TH6210U2001 Installation Manual provides comprehensive guidance for successful thermostat setup and maintenance. Follow the steps carefully to ensure optimal performance and energy efficiency.
10.1 Summary of Key Installation Steps
Mount the thermostat securely, connect wiring carefully, and ensure the adapter is installed correctly. Follow safety precautions, verify compatibility, and test functionality post-installation. Regular maintenance and updates ensure long-term efficiency and reliability of your Honeywell TH6210U2001 thermostat.
10.2 Final Tips forSuccessful Usage
Regularly clean the thermostat and check for software updates. Refer to the user guide for troubleshooting common issues. Ensure proper power supply and verify wire connections periodically. For optimal performance, schedule routine maintenance and consider integrating with smart home systems if compatible. Contact Honeywell support for additional assistance or resources.