
Aprilaire E100 Installation: A Comprehensive Guide (Updated 03/23/2026)
Unlock seamless installation and optimal performance! This guide, paired with the official Aprilaire E100 Installation Manual PDF, ensures a smooth setup and lasting comfort for your home.
Understanding the Aprilaire E100 Whole-House Humidifier
The Aprilaire E100 is a bypass humidifier designed to add moisture to your home’s air through your existing forced-air heating and cooling system. Unlike portable humidifiers, the E100 provides whole-house humidification, offering consistent comfort and helping to alleviate dry air symptoms.
Understanding its operation is key to successful installation, and the Aprilaire E100 Installation Manual PDF is your primary resource. This manual details how the E100 integrates with your HVAC system, utilizing the blower motor to distribute moisture. It explains the bypass method, where a portion of warm air is diverted through the humidifier’s water panel, picking up moisture before returning to the ductwork.
The E100’s capacity is suitable for homes up to 2,000 square feet, and proper installation, guided by the manual, ensures efficient and effective humidification, contributing to improved health, comfort, and protection of your home’s furnishings.
What’s Included in the E100 Package?
Upon opening your Aprilaire E100 package, you’ll find several key components essential for a complete installation. These include the humidifier unit itself, the mounting bracket for secure attachment, and the water panel – the core element responsible for moisture evaporation.
The package also contains various fittings and connectors for the water supply line and drain line, crucial for proper water management. Refer to the Aprilaire E100 Installation Manual PDF for a detailed parts list and diagrams. It visually confirms all included items.
Notably, the package does not include the water supply line or drain line tubing, nor does it include electrical wiring. These must be purchased separately, ensuring compatibility with your home’s existing infrastructure. The manual clarifies these requirements, preventing installation delays.
Tools Required for Installation
Successful Aprilaire E100 installation demands a specific toolkit. Essential tools include a Phillips head screwdriver for securing the unit and various components, and a flathead screwdriver for adjustments. A drill with appropriate bits is necessary for mounting the bracket to your ductwork – consult the Aprilaire E100 Installation Manual PDF for recommended drill bit sizes.
You’ll also need pipe-cutting tools for the water supply line, and potentially Teflon tape to ensure watertight connections. A level is crucial for proper unit alignment, preventing operational issues. Wire strippers and a voltage tester are vital for safe electrical connections.
Finally, having adjustable pliers and a utility knife on hand will prove beneficial. The manual’s tool list provides a comprehensive overview, ensuring you’re fully prepared before beginning the installation process.

Pre-Installation Considerations
Careful planning is key! Review the Aprilaire E100 Installation Manual PDF to verify HVAC compatibility, water access, and electrical setup before you begin installation.
Checking Your HVAC System Compatibility
Ensuring a proper fit is crucial for optimal performance. Before commencing installation, meticulously consult the Aprilaire E100 Installation Manual PDF to confirm your existing HVAC system’s compatibility. The manual details specific requirements regarding furnace type (gas, oil, or electric), airflow capacity, and ductwork size.
Specifically, verify your furnace blower motor can deliver sufficient static pressure for the E100’s operation. Insufficient airflow can lead to reduced humidification and potential system strain. The manual provides charts and guidelines to help you assess this. Pay close attention to any limitations regarding high-efficiency furnaces, as they may require additional considerations;
Furthermore, confirm adequate space exists within your ductwork for the humidifier’s installation without obstructing airflow. Incorrect installation can compromise your HVAC system’s efficiency and the humidifier’s effectiveness. A thorough review of the manual’s diagrams and specifications is highly recommended.
Water Supply Line Requirements
A reliable water source is essential for consistent humidification. The Aprilaire E100 Installation Manual PDF outlines precise requirements for the water supply line. A cold water connection, typically ¼-inch copper or PEX tubing, is needed, positioned within a specific distance of the humidifier unit – generally no more than 50 feet.
The manual stresses the importance of avoiding hot water lines, as elevated temperatures can damage the humidifier. A shut-off valve is mandatory for easy maintenance and emergency situations. Ensure the water pressure falls within the specified range (typically 20-100 PSI) to prevent operational issues.
Consider using a saddle valve only as a temporary solution; a direct tap into the water line is preferred for long-term reliability. Always adhere to local plumbing codes and regulations during installation. The manual provides detailed diagrams illustrating proper connection methods and recommended materials.
Electrical Connection Specifications
Safe and correct electrical wiring is paramount for the Aprilaire E100’s operation. The Aprilaire E100 Installation Manual PDF details specific electrical requirements. The unit typically requires a 120V AC, 60Hz power supply. A dedicated circuit is highly recommended to prevent interference from other appliances.
The manual emphasizes the necessity of a properly grounded connection. Never connect the humidifier to an extension cord or multi-outlet adapter. Wiring must comply with all local electrical codes. A qualified electrician should perform the electrical connection if you are unfamiliar with electrical work.
The manual provides clear wiring diagrams, specifying wire gauge and connection points. It also outlines the importance of using appropriate wire connectors and ensuring all connections are secure. Disconnect power at the breaker before commencing any electrical work for safety.

Installation Steps: A Detailed Walkthrough
Follow the Aprilaire E100 Installation Manual PDF closely! This guide provides a step-by-step process, ensuring correct mounting, connections, and optimal humidifier functionality.
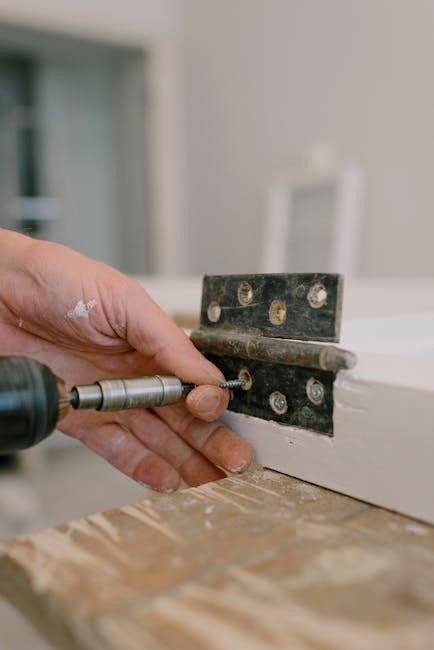
Step 1: Mounting the Humidifier Unit
Securely mounting the Aprilaire E100 is crucial for stable operation. Refer to the Aprilaire E100 Installation Manual PDF for precise location guidance – typically on the supply-air ductwork, ensuring sufficient space for maintenance and water panel access.
Begin by selecting a sturdy section of ductwork, ideally straight and horizontal. Use the provided mounting bracket and screws, verifying they are appropriate for your duct material. Important: Ensure the unit is level to prevent water spillage and uneven panel saturation.
The manual details specific clearances required around the unit for airflow and serviceability. Double-check these dimensions before final tightening. Improper mounting can lead to vibration, noise, and reduced humidifier efficiency. Always prioritize safety and consult a professional if unsure about ductwork integrity.
Confirm the bracket is firmly attached before proceeding to the next step.
Step 2: Connecting the Water Supply Line
Establishing a reliable water supply is vital for the Aprilaire E100’s function. The Aprilaire E100 Installation Manual PDF emphasizes using a dedicated cold-water line, ideally ½ inch copper or PEX tubing. Avoid using hot water lines or lines with significant mineral content.
Install a saddle valve or tee fitting on the chosen water line, ensuring a tight, leak-proof connection. Use Teflon tape on all threaded connections. The manual specifies a maximum water pressure of 75 PSI; install a pressure regulator if necessary.
Carefully run the water supply line to the humidifier’s water inlet, following the manual’s routing guidelines to prevent kinks or obstructions. Crucially, a shut-off valve should be installed on the water supply line for easy maintenance and emergency shut-off.
Before proceeding, slowly turn on the water supply and inspect for leaks.
Step 3: Connecting the Drain Line
Proper drain line installation prevents water damage and ensures efficient operation. The Aprilaire E100 Installation Manual PDF details a gravity-fed drain system as the primary method. Use ¾ inch PVC or polyethylene tubing for the drain line, ensuring a continuous downward slope to prevent backflow.
Route the drain line to a suitable drain location – a floor drain, standpipe, or laundry tub. Avoid connecting the drain line directly to a sewer line, as this can cause odors. Secure the drain line with clamps or supports to maintain the slope and prevent disconnections.
The manual stresses the importance of an air gap between the drain line and the drain receptor to prevent siphoning. Carefully check all connections for leaks after establishing the drain line.
Ensure the drain line isn’t kinked or obstructed, allowing for free water flow;
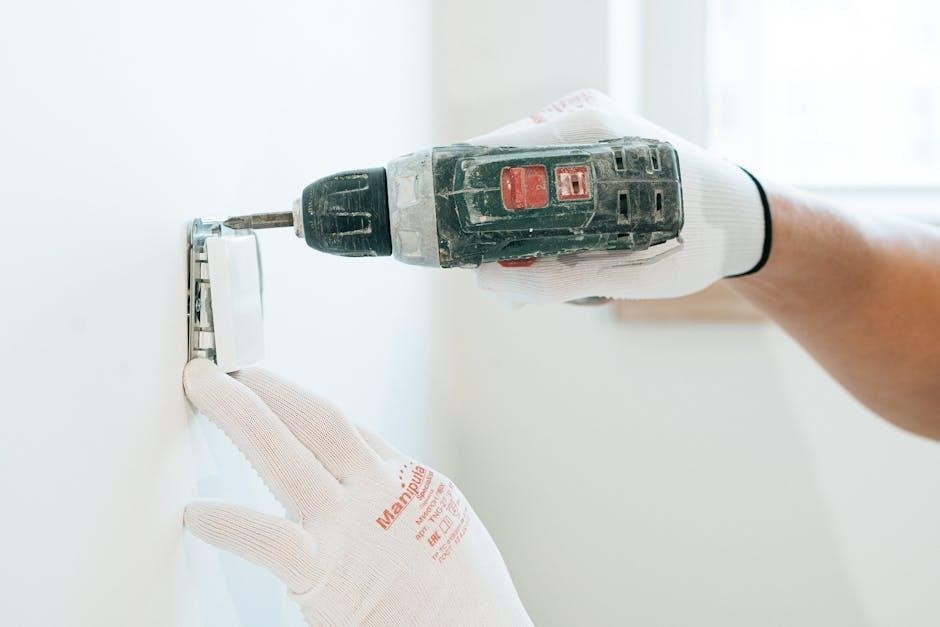
Step 4: Electrical Wiring – Safety First!
Electrical safety is paramount during installation! The Aprilaire E100 Installation Manual PDF emphatically advises disconnecting power to the HVAC system at the breaker box before commencing any electrical work. Verify power is off with a non-contact voltage tester.
The E100 typically requires a 24V AC power source, often obtained from the furnace control board. Refer to the manual’s wiring diagrams for precise connection instructions. Use appropriately sized wire connectors and ensure all connections are secure.
Never exceed the voltage or amperage ratings specified in the manual. Improper wiring can damage the humidifier or the HVAC system, and poses a fire hazard. Grounding is crucial; follow local electrical codes diligently.
Double-check all wiring before restoring power, and always consult a qualified electrician if you are uncomfortable with any aspect of the electrical connection.
Step 5: Connecting the Humidifier to the Ductwork
Proper ductwork connection is vital for efficient humidification! The Aprilaire E100 Installation Manual PDF details specific requirements for duct sizing and placement. Typically, the E100 is installed on the supply-side ductwork, downstream of the furnace, ensuring warm air passes through the evaporator pad.
Cut a section of ductwork to accommodate the humidifier’s housing. Securely attach the humidifier using sheet metal screws and duct sealant, ensuring an airtight seal to prevent air leaks; Follow the manual’s guidance on maintaining proper airflow – restrictions can reduce effectiveness.
Consider duct orientation for condensate drainage. The manual may recommend specific configurations to facilitate water flow to the drain line. Ensure sufficient space around the unit for maintenance and water panel access.
A well-sealed and properly positioned connection maximizes humidity distribution throughout your home.
Post-Installation Checks & Setup
Verify correct operation! Consult the Aprilaire E100 Installation Manual PDF for detailed post-installation procedures, ensuring optimal performance and a comfortable home environment.
Initial System Startup and Water Panel Saturation
First Power-Up: Following installation, referencing the Aprilaire E100 Installation Manual PDF is crucial. Begin by turning on the furnace and verifying the humidifier’s power. The initial startup focuses on saturating the water panel – this process is vital for efficient humidity distribution.
Water Panel Soak: Allow ample time, typically 24-48 hours, for the water panel to become fully saturated. During this period, you may notice a slower humidity increase. The manual details how to observe water flow and panel wetting. Avoid adjusting humidity settings prematurely.
Monitoring & Adjustment: Regularly check for proper water supply and drainage; The Aprilaire E100 Installation Manual PDF provides diagrams illustrating correct water flow. Once the panel is saturated, you can begin fine-tuning the humidity control to your desired level, as outlined in the manual’s setup section.
Setting the Optimal Humidity Level
Finding Your Comfort Zone: The Aprilaire E100 Installation Manual PDF emphasizes personalized humidity control. Optimal levels depend on your climate, home insulation, and personal preference. A recommended starting point is typically between 35-40% relative humidity during the heating season.
Using the Control: The manual provides detailed instructions on navigating the humidifier’s control panel. It explains how to adjust the humidity setting incrementally, allowing you to observe the impact on your home’s comfort. Monitor for condensation on windows – a sign of excessive humidity.
Seasonal Adjustments: Refer to the Aprilaire E100 Installation Manual PDF for guidance on seasonal adjustments. Colder temperatures generally require higher humidity settings. Experiment to find the balance between comfort and preventing moisture-related issues within your home.
Testing the Water Supply and Drain Lines
Ensuring Leak-Free Operation: The Aprilaire E100 Installation Manual PDF stresses the importance of thorough testing. After connecting the water supply and drain lines, carefully inspect all connections for leaks. Gently tighten fittings as needed, but avoid over-tightening, which can cause damage.
Water Supply Test: Slowly turn on the water supply valve and observe the connection to the humidifier. Check for drips or sprays. The manual details the proper water pressure range for optimal performance.
Drain Line Test: Allow the humidifier to cycle and fill with water. Verify that the drain line is effectively carrying water away from the unit and into the designated drain. The Aprilaire E100 Installation Manual PDF provides troubleshooting tips for drain line clogs.

Troubleshooting Common Issues
Resolve problems quickly! Consult the Aprilaire E100 Installation Manual PDF for detailed diagnostics and solutions to common issues, ensuring peak humidifier performance.
Humidifier Not Turning On
Diagnosing a non-responsive Aprilaire E100 begins with a systematic check. First, consult the Aprilaire E100 Installation Manual PDF for specific troubleshooting steps related to power supply. Verify the electrical connection at the furnace control board, ensuring the transformer is functioning correctly and providing the required 24V AC power.
Next, inspect the humidifier’s internal fuse (if equipped) for any signs of damage or blowing. A tripped circuit breaker affecting the furnace can also prevent the humidifier from powering on. Confirm the furnace itself is operating normally.
The manual details how to test the solenoid valve, which may be faulty. Finally, check the control settings on your thermostat or Aprilaire control panel to ensure the humidifier is enabled and set to an appropriate operating mode. Always disconnect power before inspecting electrical components!
Water Leaks – Identifying the Source

Addressing water leaks promptly is crucial. Begin by referencing the Aprilaire E100 Installation Manual PDF for detailed diagrams of the water supply and drain line connections. Carefully inspect the fittings at the water inlet valve and the drain line outlet for any signs of looseness or cracks.
Check the water panel housing for proper seating and sealing. A misaligned or damaged water panel can cause overflow. Examine the drain line itself for clogs or kinks, which can lead to backflow.
Inspect the humidifier unit’s base for cracks or leaks originating from internal components. Always disconnect the water supply before investigating leaks! The manual provides guidance on tightening connections and replacing worn parts. Persistent leaks may indicate a faulty solenoid valve or water panel housing.
No Humidity Increase – Potential Causes
If your Aprilaire E100 isn’t raising humidity levels, consult the Aprilaire E100 Installation Manual PDF for a systematic troubleshooting approach. First, verify the unit is receiving power and the control panel is set to the desired humidity level.
Check the water panel – is it fully saturated? A dry panel won’t add moisture. Inspect the water supply valve to ensure it’s fully open. A partially closed valve restricts water flow.
Examine the ductwork connection; improper sealing can lead to air bypassing the humidifier. Confirm the blower fan is operating at the correct speed, as insufficient airflow reduces humidification. The manual details proper airflow requirements. Finally, consider external factors like extremely cold outdoor temperatures, which can overwhelm the unit’s capacity.
White Dust Issues and Solutions
Experiencing white dust? The Aprilaire E100 Installation Manual PDF addresses this common concern. White dust typically indicates excessive mineral buildup from hard water. The humidifier disperses these minerals into the air.
A simple solution is to lower the humidity setting, reducing the amount of mineralized water vapor released. Consider installing a water softener or a whole-house water filter to pre-treat the water supply, removing minerals before they reach the humidifier.
Regular cleaning, as outlined in the manual, is crucial. Periodically wipe down surfaces near the humidifier to remove accumulated dust. The manual also recommends checking and cleaning the solenoid valve to prevent mineral deposits from hindering its function.
Maintenance and Long-Term Care
Maximize your humidifier’s lifespan! Refer to the Aprilaire E100 Installation Manual PDF for detailed schedules regarding water panel replacement and unit cleaning procedures.
Replacing the Water Panel (Frequency & Procedure)
Maintaining optimal humidity relies on a fresh water panel. The Aprilaire E100 Installation Manual PDF details replacement frequency, typically every 1-2 seasons, depending on water quality and usage. Begin by shutting off the water supply to the humidifier. Carefully remove the old water panel – it may contain mineral buildup.
Before installing the new panel, inspect the water trough for debris and clean thoroughly. Align the new Aprilaire E100 water panel correctly within the trough, ensuring a snug fit. Reconnect the water supply and verify proper saturation.
Important: Always refer to the manual for specific panel part numbers and detailed diagrams. Ignoring recommended replacement schedules can lead to reduced efficiency, mineral buildup, and potential humidifier malfunction. Proper panel maintenance is crucial for consistent, healthy humidity levels.
Cleaning the Humidifier Unit
Regular cleaning extends the life and efficiency of your Aprilaire E100. The Aprilaire E100 Installation Manual PDF emphasizes annual cleaning, ideally before the heating season. Begin by disconnecting power to the unit at the breaker. Remove the water panel and thoroughly clean the water trough with a mild bleach solution (follow manual’s dilution instructions!).
Inspect and clean the solenoid valve, ensuring it’s free of debris. Wipe down the humidifier’s exterior with a damp cloth. Caution: Avoid harsh chemicals or abrasive cleaners. Rinse all components thoroughly with clean water before reassembly.
Proper cleaning prevents mineral buildup, mold growth, and ensures optimal performance. Refer to the manual’s diagrams for component locations and specific cleaning recommendations. A clean humidifier delivers healthier, more consistent humidity throughout your home.
Winterization Procedures for Extended Non-Use
Preparing your Aprilaire E100 for prolonged inactivity is crucial. The Aprilaire E100 Installation Manual PDF details essential steps to prevent damage during off-season storage. First, disconnect the water supply line and drain all remaining water from the unit and the supply line to avoid freezing.
Remove and discard the water panel; do not store a wet panel. Thoroughly dry the humidifier’s interior, including the water trough and solenoid valve. Consider applying a rust inhibitor to metal components. Disconnect the electrical connection for safety.
Cover the unit to protect it from dust and debris. Proper winterization safeguards against costly repairs and ensures your humidifier is ready for seamless operation next heating season. Always consult the manual for specific recommendations.

Resources and Support
Need further assistance? Access the official Aprilaire E100 Installation Manual PDF online, or connect directly with Aprilaire’s dedicated customer support team for expert guidance.
Finding the Official Aprilaire E100 Installation Manual PDF
Locating the official Aprilaire E100 Installation Manual PDF is crucial for a successful and safe installation process. Aprilaire provides this valuable resource directly on their website, ensuring you have the most up-to-date information at your fingertips.
A quick search on the Aprilaire website (www.aprilaire.com) using keywords like “E100 Installation Manual” or “Whole-House Humidifier Manual” will lead you directly to the downloadable PDF. Alternatively, many HVAC equipment suppliers and retailers also host links to the official manual on their websites.
Important Note: Always verify that the PDF you download originates from a trusted source, such as Aprilaire’s official website, to ensure accuracy and avoid outdated or incorrect instructions. The manual contains detailed diagrams, safety precautions, and step-by-step guidance essential for proper installation and operation of your E100 humidifier.
Aprilaire Customer Support Contact Information
Need assistance beyond the Aprilaire E100 Installation Manual PDF? Aprilaire offers comprehensive customer support to guide you through any challenges. For direct support, you can reach their dedicated team via phone at 1-800-307-7294. This line is available during standard business hours, Monday through Friday.
Alternatively, explore the extensive support resources available on the Aprilaire website (www.aprilaire.com). Their website features a detailed FAQ section, troubleshooting guides, and a contact form for submitting inquiries. You can also find a network of authorized Aprilaire dealers in your area who can provide professional installation and support services.
Pro Tip: Having your E100 model number readily available when contacting support will expedite the assistance process.
Warranty Information for the E100 Model
Protect your investment! The Aprilaire E100 whole-house humidifier is backed by a comprehensive warranty, detailed within the official Aprilaire E100 Installation Manual PDF. Generally, Aprilaire provides a 5-year limited warranty on the humidifier unit itself, covering defects in materials and workmanship.
This warranty doesn’t cover issues arising from improper installation, misuse, or lack of regular maintenance as outlined in the manual. The water panel is typically covered for one year. Registration of your E100 within 90 days of purchase is crucial to activate the full warranty benefits.
Important: Keep your proof of purchase and warranty registration confirmation readily available. For specific warranty terms, conditions, and claim procedures, always refer to the complete warranty documentation included with your product or found within the PDF manual.